Time to put them all together :) 11. Put the top together like you see below. For your convenience I've made a table that shows you what unit goes where, but I think it's pretty obvious just by looking at the photograph of the top. I sewed this into four quarters and then put them together that way -- because I don't pin my work so I don't like having long seams if I can help it :) Please note that you will have to turn some of the units in order to make them fit right in the pattern -- however if you pay close attention you should be fine. I suggest laying the quilt out somewhere so you can see how it all fits together. If you want row by row pictures, my Mother took these when she test sewed this pattern.
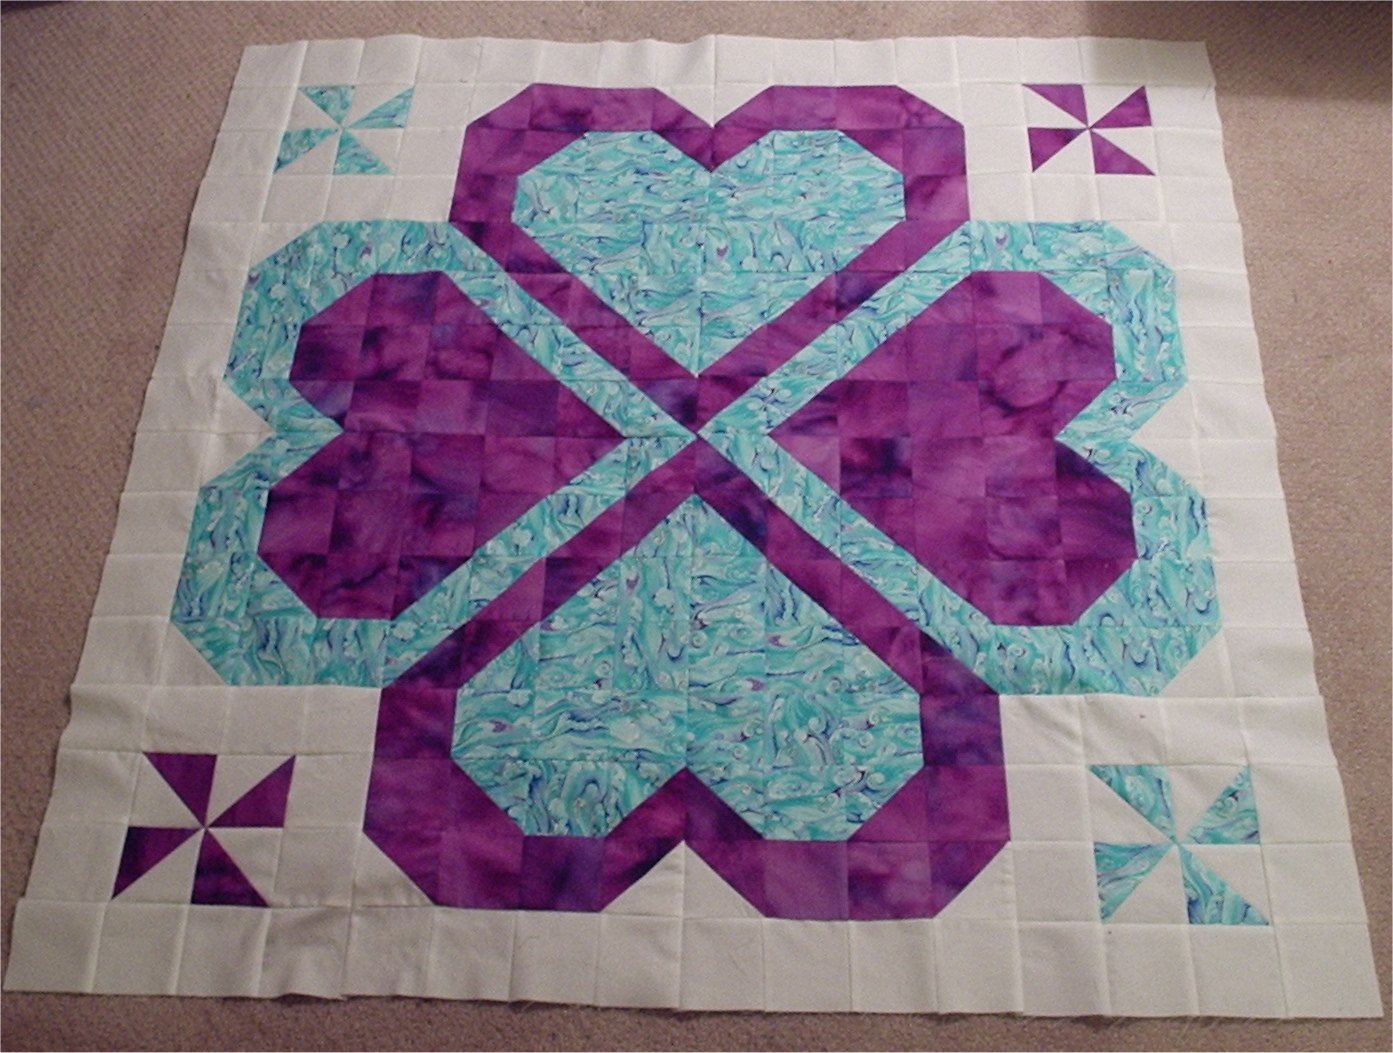 Click on the image to see a larger version Now that you've got it all together, you're ready to add whatever borders you think suit it the best. I welcome your feedback regarding this mystery quilt -- please email me at rhonda@jofigure.com and let me know what you think. I'd also be interested in showcasing your wonderful work on the following page -- if you'd like to play virtual show and tell, please send me a picture of your quilt top along with whatever name you'd like to be creditted with. Thank you for doing my mystery, I had loads of fun putting it together and I can't wait to do more :) |