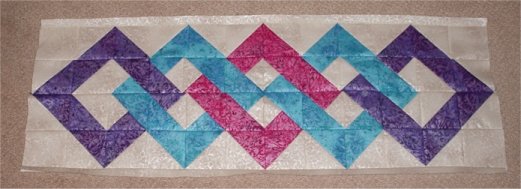
13. Use the table below along with the picture to lay out your units on the floor. Please note that some of the units will have to be flipped in order to make them line up the way they are meant to.
|
Unit #1
|
Unit #2
|
Unit #3
|
Unit #4
|
|
Unit #4
|
Unit #3
|
Unit #2
|
Unit #1
|
 You can click on the above image if you want to see a larger version of it.
14. Now it’s time to add the borders. First of all, measure the width of your tablerunner across the middle, then cut the 1″ strips of background fabric to that length and sew them along the top and bottom of the tablerunner. It will look something like this:
15. Finally, take the 10″ square of background fabric and cut it in half diagonally. Sew one of the resulting triangles on to either end of the tablerunner — the triangles will be a little long, but that’s okay, you can cut the dog ears off when you’re done. The end result will look something like this:
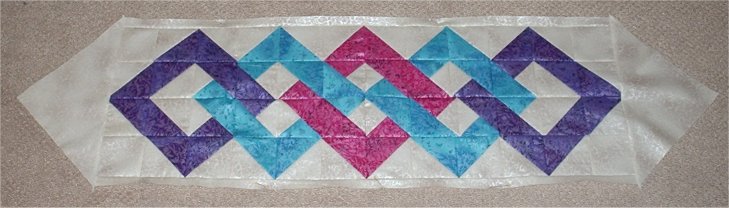
If you’d like to add another border you ought to have enough of your color #3 fabric left over to do so but I decided that I liked it just fine the way it was.
Thank you very much for doing this mystery, I hope you enjoyed it half as much as I did. Please send me photographs of your finished work so I can share them with the world on this website (or if you’re shy just tell me and I promise I’ll be the only one to oogle them LOL). My email address is Rhonda@jofigure.com